
CONTENTS
Mastering the Craft of Refinishing Hardwood Floors
If you’ve ever walked into a room with beautifully restored hardwood flooring, you know the impact it can make. The timeless elegance, the warm hues, and the smooth finish all contribute to creating a space that oozes charm and sophistication.
Are your hardwood floors in need of a fresh makeover? Hardwood floor refinishing helps breathe new life into your living space and gives it a stunning, polished look. You can DIY with our step-by-step process of bringing back your hardwood floors to life.
Ready to embark on a journey of refinishing hardwood floors? Let’s get started!
How To Refinish Hardwood Floors
Get ready to transform your space with these expert tips and tricks for hardwood floor refinishing. Let’s dive in!
Prepare the Room for Sanding

Before you conduct the whole refinishing process, ensure your floor is ready to be sanded.
Start by removing all furniture, rugs, and any other items from the room. This will provide you with a clean and empty space to work in. Then, you can do these further preparations:
- Protect surrounding areas with plastic sheeting or tape.
- Seal off electrical outlets and switches.
- Ensure proper ventilation.
- Inspect and secure the floor.
- Clean the floor thoroughly.
- Fill gaps and cracks.
- Consider removing baseboards
By following these steps, you’ll have a well-prepared room for sanding your hardwood floor.
Start Sanding
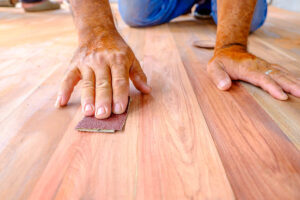
Once you have prepared the room for sanding, it’s time to start sanding. Sanding helps remove old finishes, scratches, and imperfections from the wood surface, preparing it for a fresh new finish.
Here are the step-by-step to sand the floor:
- Choose the right sandpaper: Select the appropriate grit of sandpaper based on the condition of your floors. Coarse grits, such as 24 or 36, are best for removing old finishes and deep scratches. Medium grits, like 60 or 80, are ideal for smoothing out rough areas, while fine grits, such as 100 or 120, help achieve a smooth surface.
- Use a floor sander: There are different types of sanders available, including drum sanders and orbital sanders.
- Safety precautions: Before you begin sanding, wear protective gear and ensure the room is well-ventilated.
- Start with the coarsest grit: Attach the appropriate sandpaper to the sander according to the manufacturer’s instructions. Begin sanding with the coarsest grit, moving the sander toward the wood grain at a steady pace.
- Work systematically: Divide the floor into smaller sections and sand one section at a time. Overlap each pass slightly to ensure even sanding.
- Progress to finer grits: After completing the first sanding pass with the coarsest grit, switch to medium-grit sandpaper and repeat the process.
- Edge sanding: Use a handheld edge sander or sandpaper wrapped around a sanding block to reach the edges and corners of the room that the floor sander couldn’t reach.
Once you have finished sanding, vacuum the entire floor and entire room to remove all debris and dust. Wipe down the floor using a damp cloth to make sure it is squeaky clean and ready for staining.
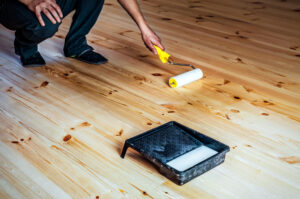
Stain Your Floors

After sanding the hardwood floors, the next step is to stain the floors.
Choose a wood stain color that suits your aesthetic and apply it evenly using a brush or cloth, following the wood grain. Clean off excess stains and let it dry completely. Assess the color and apply additional coats if desired.
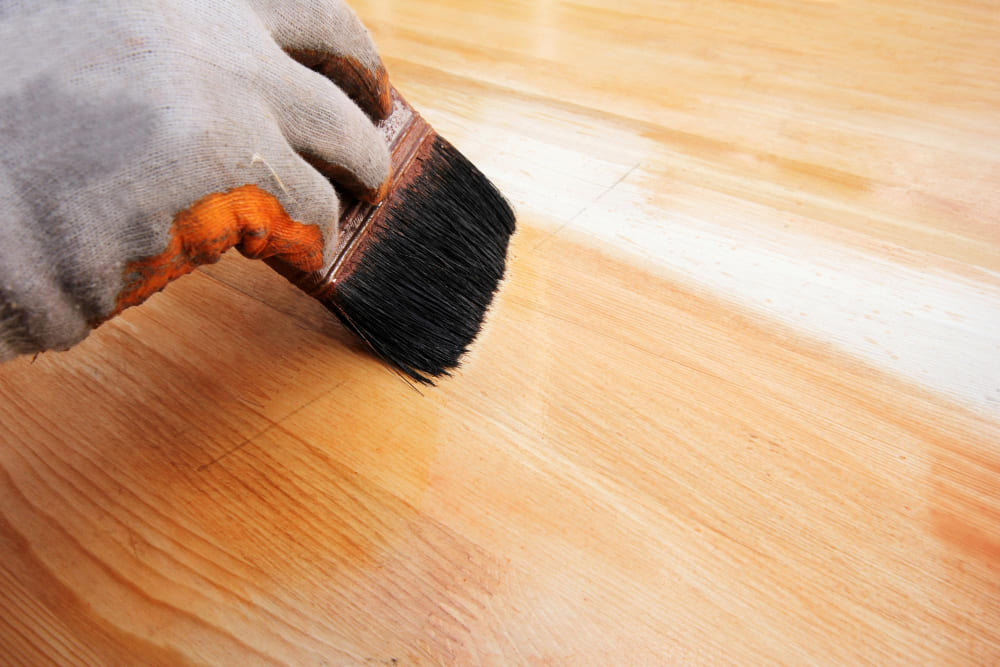
Seal Your Floors
Sealing your floors is the final step in refinishing hardwood floors. Choose a compatible sealant.
There are several options available for your wood floor. Polyurethane, penetrating oils and sealers, and waxes are the general types of finishes to consider. Water-based polyurethane is also a commonly used option, known for its scratch resistance and durability.
After deciding, apply the sealant evenly using a brush or roller. Allow it to dry thoroughly, and consider applying multiple coats for added protection.
Let the sealant cure completely before placing furniture or walking on the floor.
Frequently Asked Questions
How much will a professional charge refinish my hardwood floors?
The cost of refinishing hardwood floors may vary depending on factors like the area’s size, floor condition, finish type, and location. On average, it can range from $3 – $8 per square foot. Additional services may add to the cost.
Is it difficult to refinish hardwood floors?
Refinishing hardwood floors can be challenging. It involves sanding, staining, and applying the finish precisely. While professionals are recommended for the best results for the wood floors, especially if you lack experience, you can try it out if you want to.
How often should hardwood floors be refinished?
Generally, hardwood floors may need refinishing every 7-10 years for a home with normal usage. High-traffic areas might require more frequent refinishing.
Conclusion
In conclusion, mastering the craft of refinishing hardwood floors is a rewarding endeavor that can transform the look and feel of any space. By following the step-by-step process of sanding, staining, and sealing, you can breathe new life into worn-out floors and bring out their natural beauty.
So, gather your tools, put on your protective gear, and dive into the world of refinishing hardwood floors. With practice and dedication, you’ll soon become a master of this craft, creating beautiful spaces that stand the test of time. Happy refinishing!