
CONTENTS
Smooth Ceiling Solutions: How to Remove Popcorn Ceiling Safely
Are you tired of staring up at that dated popcorn ceiling in your home? In fact, a popcorn texture can weigh down the entire room, making it feel outdated and dull.
Fortunately, there are easy ways to clean popcorn ceilings safely—no need to call for a professional’s help!
Ahead, we’ll dive into the tricks to tackle this issue with clear instructions on how to remove popcorn ceiling to achieve smooth, modern ceilings without the hassle. Get ready to say goodbye to those lumpy popcorn ceilings!
How To Remove Popcorn Ceiling
Ready to remove those textured popcorn ceilings and get a brand new home environment? Read on these steps!
Do a Scrape Test
Before fully committing to removing the entire textured ceiling, do a scrape test as an essential first step. This process involves testing a small section of the ceiling to determine if it can be easily removed or if additional measures need to be taken.
To perform a scrape test, follow these steps:
- Prepare the area: Cover the furniture and floor with plastic sheets to avoid dust and debris from piling up.
- Safety precautions: Wear safety goggles, gloves, and a face mask to protect yourself from potential hazards.
- Moistening the ceiling: Spray a small section of the popcorn ceiling with water using a spray bottle.
- Scrape the texture: Gently scrape off the wet popcorn texture using a putty knife or a scraper. Start in a corner and work your way across the section.
Once the texture is scraped off, examine the condition of the ceiling. If the process is relatively easy and the ceiling remains intact, you can proceed with the full removal.
However, if the texture does not come off easily or the ceiling sustains damage, you may need to consider alternative methods or consult a professional.
Test For Asbestos
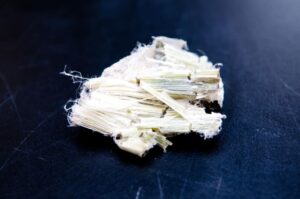
Asbestos is a dangerous material used to construct popcorn ceilings. This material was popular before the 1980s. It can cause serious health risks if disturbed or released into the air during removal. Usually, older homes’ constructions have this.
After ensuring you’ve prepared with the safety gear, carefully scrape a small section of the popcorn ceiling using a putty knife or scraper. Collect the scraped-off material in a sealable plastic bag.
Contact a licensed asbestos testing laboratory to submit the collected sample for analysis. Wait for the result to proceed further.
Prepare For Removal

After receiving a negative asbestos result, proceed to prepare for removal. Even if the asbestos test returns negative, it’s still essential to prioritize safety by wearing protective gear.
To get started, remove any furniture, decorations, or other items from the room to create a clean and clutter-free workspace.
Cover the remaining area with drop cloths or plastic sheets to avoid dust and potential damage from being piled up during the removal.
Gather Your Tools
After you’ve done the preparation, gather the important tool in one place to make the removal process easier. Some important tools are:
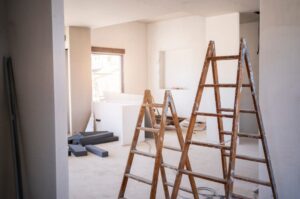
- Ladder or scaffolding: Depending on your ceiling’s height, you may need a ladder or scaffolding to reach and work on the popcorn texture.
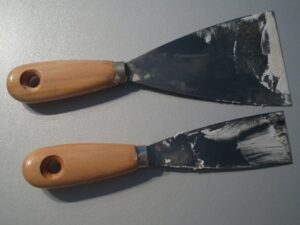
- Scraper or putty knife: Choose a tool with a wide and flat blade for better control and efficiency during the scraping off.
- Misting spray bottle: Fill a misting spray bottle with water to dampen the popcorn ceiling.
- Plastic bags or trash bins: Have plastic bags or trash bins ready to collect and dispose of the scraped-off popcorn texture.
- A vacuum cleaner with HEPA filter: After removing the popcorn texture, use a vacuum cleaner with a HEPA filter to thoroughly clean fine particles from the area. You can use handheld vacuums or other vacuum types.
- Paint and repair supplies (optional): If you plan to paint or repair the ceiling after removing the popcorn texture, gather the necessary supplies such as paint, brushes, rollers, spackle, sandpaper, and primer.
Spray The Ceiling With Water
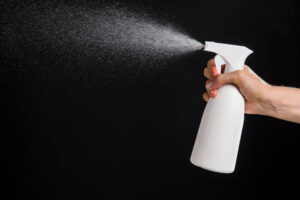
The purpose of spraying the ceiling with water is to moisten the popcorn texture, making it easier to scrape off and result in a smooth ceiling.
Stand directly under the area you’re working on and begin misting the popcorn texture. Work in small sections, spraying enough water to dampen the surface without causing it to become overly saturated.
After misting the ceiling, allow the water to soak into the popcorn texture for a few minutes.
Once the popcorn texture is sufficiently softened, work in small sections, scraping off the texture with a scraper or putty knife.
During the removal process, the ceiling may start to dry out. If necessary, mist the area again to moisten it and make the scraping easier.
Sand, Prime, And Paint
Once the popcorn texture is removed, the underlying surface may be rough or uneven. Sanding helps to smooth out any imperfections and create a flat surface for painting.
If you’re unsatisfied with the result, try priming and painting the ceilings.
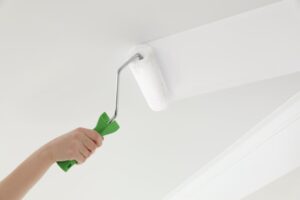
Primer helps to seal the surface, provides better adhesion for the paint, and ensures a more uniform finish. Apply the primer slowly and evenly using a brush or roller across the entire ceiling.
After the primer has been set, the final step is to paint the ceiling with your desired color. Use a roller with an extension pole to apply the paint in smooth, even strokes. Work in sections, overlapping each stroke slightly to achieve a consistent finish.
Frequently Asked Questions
Should you cover up a popcorn ceiling?
It depends on the condition of the popcorn ceiling. If it is in good condition with no signs of damage or asbestos, covering it up may be a simpler and more cost-effective solution compared to removing it.
When did people stop using asbestos in popcorn ceilings?
Asbestos was commonly used in popcorn ceilings until the late 1980s, when its health risks became more widely recognized. Regulations and awareness about asbestos led to its discontinuation in popcorn ceiling materials around that time.
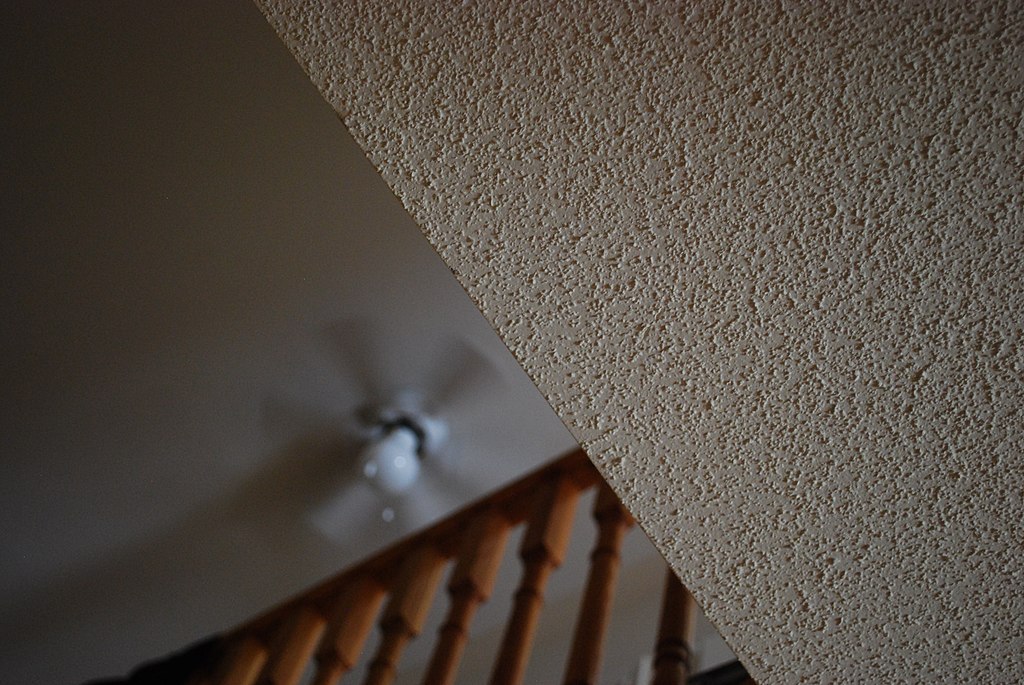
What does an asbestos popcorn ceiling look like?
An asbestos popcorn ceiling has a bumpy, textured appearance resembling popcorn or cottage cheese. It’s hard to tell from bare eyes, though. Thus, a lab test is very encouraged.
Conclusion
In short, removing a popcorn ceiling can be a rewarding and transformative project for any homeowner. While it may seem daunting, following the proper techniques and safety precautions can make the process safer and more manageable.
While popcorn ceiling removal can be time-consuming and labor-intensive, the end result is worth the effort. A smooth ceiling not only gives your home a modern look but also improves lighting and acoustics in the room.
So, if you’re ready for a fresh and updated look in your home, consider removing the popcorn ceiling. With proper techniques and precautions, you’ll be on your way to a smoother and more inviting space!