
CONTENTS

How to Replace a Gas Stove
If you’re nervous about the idea of disconnecting a gas line in your home, whether for a remodel or a small project, you have a good reason.
Many homeowners immediately call a professional when it comes to gas lines, gas stoves, and even small things like changing a damaged igniter.
This is because natural gas is highly combustible, and when handled badly could cause explosive damage to the entire house.
While any homeowner can change their stove igniters, installing a gas stove can be a DIY task for those who are mechanically confident.
When it comes to gas appliances, ignorance isn’t bliss.
Even those who intend to hire a professional should know the basic procedures surrounding the maintenance and installation of their gas appliances.
A properly installed gas stove can be extremely stable.
There are many chic models that fit right into your beautiful wooden countertops, and for those of you still shopping around, check out our recommendations on the best gas ranges.
How to Safely Disconnect Gas Appliances

In order to disconnect your gas appliance, you must first turn off the valve installed on the part of the line that runs to your appliance. This valve is required in most home codes.
If for some reason you do not have a shutoff valve for your appliance, you should shut off the gas line that runs to your home. This is most often located outside with your gas meter.
How to Replace a Gas Stove

Working with gas lines on your own can be risky.
If you’re not confident about what you’re doing, or if you do not have the time to be thorough with your installation, it’s best to hire a professional.
Otherwise, the process is simple but requires diligence.
- Turn of the gas valve to your stove. Some people prefer to turn off the gas to their entire home as an added measure.
- Make arrangements for your gas stove to be lifted out of place. For a range oven, this will mean removing it from the safety brackets that hold it in place against the wall. For a countertop-integrated stovetop, this will require loosening the unit to lift it out of the counter.
- Unscrew the connector of the gas line to the stove. At this point, also be sure to unplug the stove’s electrical connection as well.
- Inspect the gas line for any kinks, cracks, and bends. If it’s even slightly damaged, it must be replaced.
- Plug in the new stove, and screw the gas connector into the new stove.
- Reinstall any safety brackets that come with your new stovetop model.
- Turn the gas valve back on.
- Check for any gas leaks.
Exhaust ventilation can prevent possible combustion problems. All kitchens should have some form of exhaust ventilation. Range hoods that vent directly to the outside are the most common and effective for ventilating gas stoves. If you are putting in your first gas stove, see our tutorial on how to install a range hood.
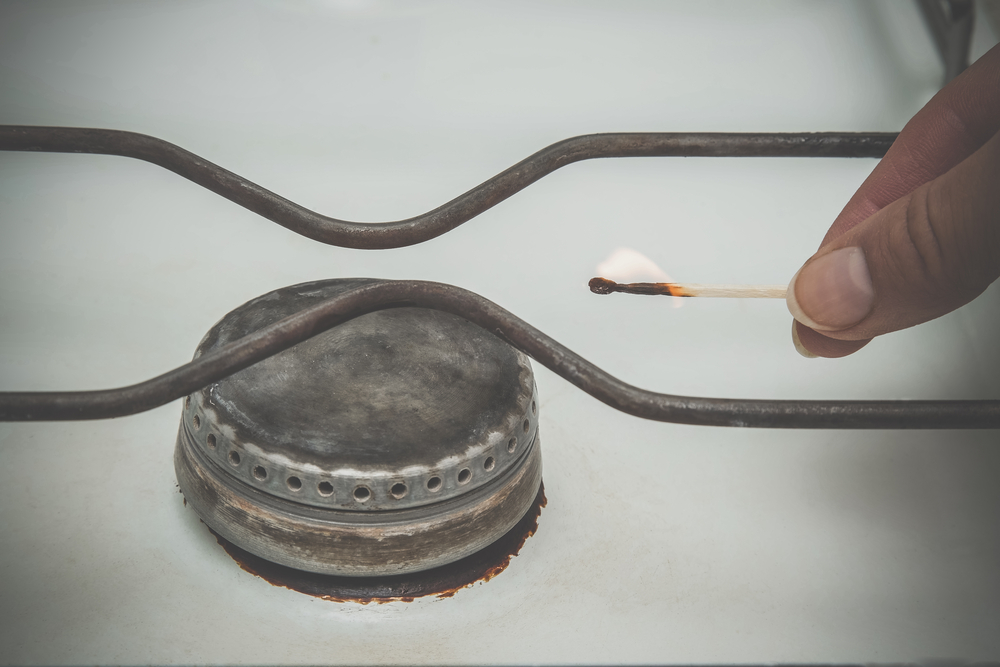
How to Use a Soap Solution to Check for Gas Leaks

In a bowl, mix 50 percent water and 50 percent dish soap. Once you have turned your gas back on, apply this solution to where you have made connections in the line. You can also use this to detect damage or leaks on the gas connector line.
If the mixture bubbles, you have a leak. You are not looking for the normal smaller bubbles. Instead, take notice of bubbles that grow in size.
If your connections are leak free, wipe off the soap solution and arrange your appliances so that they do not kink, cramp, or bend the connector cable.
If You Detect a Gas Leak
If you have used the soap test and noticed significant bubble activity, you have a leak. If a leak is detected:
- Turn off the gas supply, and then wipe off the bubble solution.
- Tighten the connection where you found the leak.
- Once tightened, slowly turn the gas back, and apply more leak detection solution to check for further leaks. If there is another leak, repeat the process.
- Wait at least ten minutes to light any pilots or any burners once all connectors are installed. This will allow the vapors to dissipate.
How to Replace the Igniter
You’ll know that it’s time to replace an igniter in your stove if it clicks multiple times without igniting the burner. The igniter’s function is to heat up until it ignites the gas released from the burner.
Clicking an igniter multiple times and failing to ignite could indicate physical damage to the igniter, such as a crack in the ceramic insulation below the electrode. Continuing to use a gas stove with a damaged igniter is dangerous, as it allows you to let unknown amounts of gas into the air.
When replacing an igniter, you should always use manufacturer recommended parts that are compatible with your stove.
- Unplug the stove’s power cord and shut off its gas valve.
- Remove the cooktop grates and lift off the burner caps. Set aside for later.
- Remove the nuts or screws that keep the burner head in place. Once these are loose, you will be able to remove the burner heads. It’s a good idea to know where these go back. You can use masking tape to mark them.
- Remove the screws that secure the cooktop, and take any other measures that you need to be able to pop the cooktop off. For many models, you will need to undo clips. When in doubt, refer to your manufacturer’s handbook.
- Lift off the cooktop and set aside.
- Carefully detach the wire attached to the bottom of the spark igniter electrode.
- Release the metal clip that holds the igniter into the burner, and remove the igniter.
- Install the new one in its place, and secure it with the metal clip.
- Reconnect the wire to the bottom of the new igniter.
- Reattach the cooktop, retracing your steps with clips and screws. Tighten all screws.
- Reposition the burner heads, and screw them into place. Then cover them with the burner caps and replace the grates.
- Reconnect gas and power.
How to Replace a Gas Line
If you have smelled gas and checked your lines, you might find that you need to replace them.
Tell-tale signs of this are tightening and retightening the connections to fix possible gas leaks, seeing visible damage in the line such as wear and tear, or checking to see whether or not you have a leak using a dishwashing fluid solution.
Leaks can be caused by hairline cracks which require a replacement line.
Only a professional should attempt to replace the metal piping that constitutes your home’s main gas line.
This is a fix that requires permits and detailed safety considerations. However, those who are careful can replace their own gas connector, otherwise known as a gas service line, that connects your appliance to your gas line.
Replacing a Gas Line Connector

When choosing a connector line, be sure to select one that is rated for a gas range with BTUs up to 100,000.
About 48 inches is the most common length for a line. Having extra length is helpful since it gives you room to move around your appliance.
You can find a universal replacement pack that that includes a coated gas line, sealant for the piping, fittings, and a package of leak detection solution.
- Shut off the gas supply.
- Use a crescent wrench to remove the old gas line and fittings, beginning with the connection that comes into the house. Then remove the connection to the stove.
- Clean the pipe threads of debris, rust, and oils. Then apply gas thread tape to the threads.
- Thread the brass safety valve onto your gas shut-off valve.
- Use two crescent wrenches now. Apply one to stabilize the shut-off valve while using the second wrench to tighten the safety valve.
- Thread the steel gas fitting to the appliance where the inlet on the appliance.
- Then thread the gas connector onto the safety valve and steel fitting. Make sure that everything is wrenched tight.
- Slowly turn the valve back open, and check for leaks. Don’t turn on the range until you’re sure that the line is free of leaks.
How to Run a Gas Line for a Stove
For a homeowner who already has a natural gas service at their home, running a gas line for the stove is a job that requires someone who is already mechanically skilled and meticulous.
Other homeowners should consider hiring a professional in order to protect themselves from the possibilities of combustion.
Here is a clear tutorial for how to extend a gas line into the kitchen to hook up a gas stove.
How to Install a Gas Stove Without a Gas Line
If you would like to install a gas stove but do not already have a gas line running to your house, there are two options.
You can either have a professional install a gas line to your home and purchase a gas service.
Or, you can choose a range that uses propane fuel and purchase a propane tank and service.
A gas service is the less expensive of the two options. The average cost of a professionally installed gas line in 2018 is $506. You should always get a professional estimate before making a decision.
If no natural gas service is able to reach your home, you can install a propane tank in your yard that is connected to your gas stove.
This tacks on extra fees, since the price of propane, is high in most areas, and you’ll most likely pay for delivery, renting the tank, as well as any environmental fees and taxes that might be in the place where you live.
Safety Tips and Considerations
- Wear work gloves to protect your hands from sharp objects.
- Only work when the cooktops and grates are cool.
- Always turn off the gas supply whenever you disconnect a part of the line.
- Do not stretch the gas line to make it fit. Gas lines should be much longer than necessary, to allow you to shift your appliances without stretching or damaging the connection.
- Do not kink, bend, or twist the gas line. This could easily cause a gas leak. When moving and installing your gas stove, be careful that you don’t pinch or kink the line.
- Not even small leaks are acceptable in your home.
Fixing the gas lines in your home can save you the premium pricing of hiring plumbers and other professionals. While some fixes are more simple, such as replacing a gas stove, or an igniter, other fixes are more involved and could require permits and professionals. Take care to always work safely and cleanly when it comes to your gas lines.
I enjoyed reading this post. It assist me in knowing the tips to replace gas stove easily. Thanks for sharing an useful post
It’s good to know that it’s more common for people to let experts deal with gas lines than doing it on their own. I’ve been trying to see what sort of upgrades can be done in my mother’s kitchen because we’re planning to transform it into the base of operations of the food business we’re planning to start someday. I guess we’re going to need to update our gas line to make this work.
The Artice Was amazing .But i M Still Confused.can you please guide me the best gas stove between 2k to 5k with as max feature as it can have.
Hi Sharma,
That is great you found the article helpful.
Please read our gas range buying guide linked below as a start and let us know if you have any follow up questions.
https://yourhousegarden.com/top-5-best-gas-range-reviews/
Kind Regards,
Lisa