
CONTENTS

Do you often find yourself standing ankle-deep in the water while showering or brushing your teeth? Or do you notice that the water in your sink takes longer to drain than usual? These are signs that your pipes may be clogged, and taking action before it worsens is important.
While calling a plumber is always an option, it can be costly and time-consuming. But don’t worry; you can effectively clean your pipes yourself with the help of a drain snake.
In this post, we’ll walk you through step-by-step instructions on using a drain snake, so you can get smooth-flowing drains in no time. Read on!
How to Use a Drain Snake in the Toilet
A clogged toilet can be annoying as it can cause an unpleasant odor, create a mess, and even potentially lead to water damage if not addressed quickly. But worry no more; we’ve compiled a step-by-step guide on safely and effectively using a drain snake specifically for your toilet. Get your rubber gloves, and let’s get it!
Remove P-Trap and Access Drain

The first step is to remove the P-trap and access the drain. The P-trap is the curved pipe beneath your toilet bowl that holds standing water, preventing sewer gases from entering your home.
You’ll need a pair of channel lock pliers, a bucket, and a towel to remove the P-trap. Then, follow these steps:
- First, turn off the water supply to your toilet and flush it to make the tank empty.
- Next, place the bucket under the P-trap to catch any water or debris that may spill out. Use the pliers to loosen the nuts that hold the P-trap in place and gently remove it.
- Once the P-trap is removed, you should have access to the drain pipe.
This step is crucial as it allows you to insert the drain snake directly into the toilet’s drain, giving you a clear path to remove the clog.
Extend Cable
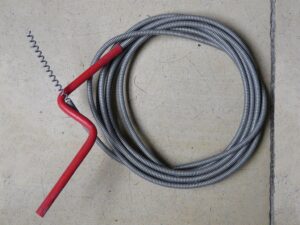
After removing the P-trap and accessing the drain, extend the cable. The cable is the long, flexible coil that makes up the body of the drain snake.
To extend the cable, loosen the thumbscrew on the drum of the drain snake. Then, by hand, extend the cable and push it into the drain pipe. Keep pushing until you feel resistance, indicating you’ve reached the clog.
It’s important to be gentle when extending the cable, as too much force could cause damage to the toilet or the plumbing system.
Snag Obstruction

After successfully reaching the obstruction causing the clog, slowly turn the handle on the drum of the drain snake, which will cause the cable to rotate as it moves deeper into the drain. As the cable rotates, it will grab onto the obstruction, break it apart, or pull it out of the drain.
Once you feel that the cable has grabbed onto the obstruction, slowly pull it back while continuing to rotate the handle. Repeat this process until you no longer feel any resistance or hear any clanging, indicating that the clog has been cleared.
Retract Cable
After you’ve removed the snag obstruction and broken apart or pulled out the clog, it’s time to remove the drain snake from the toilet.
To do this, slowly turn the handle on the drum of the drain snake in the opposite direction as before, which will cause the cable to retract back into the drum.
Once the cable is fully retracted, you can reattach the P-trap and turn on the water supply to the toilet.
Clear Drain Snake
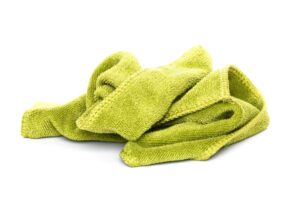
As you retract the cable, use a rag to wipe it down, removing any debris or residue that may have accumulated during the snaking process.
This step is particularly important, especially if you want to repeat the snaking process once again to ensure the clog has really been cleared, as the dirty cable will obstruct the repetition process.
Continue Clearing Pipe
Sometimes, you may need to continue clearing the pipe even after removing the drain snake. This is because there may still be debris or residue remaining in the pipe that the drain snake loosened. To continue clearing the pipe, you can repeat the snaking process.
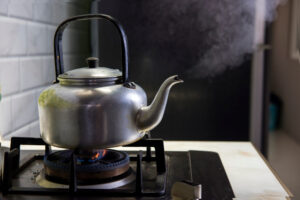
Or, you can pour hot water down the drain to flush out any remains. You may also want to use a plunger to help dislodge any stubborn clogs.
Test Drain Flow
After completing the snaking process, flush the toilet several times to ensure that the clog has been completely cleared and that the water is flowing freely through the drain.
Clean Drain Snake

You won’t want bacteria to transfer everywhere, so cleaning your drain snake is important.
First, detach the cable from the drum. Next, run hot water over the cable, using a cloth to remove any remaining debris. If you have one available, you can also use a cleaning solution specifically designed for drain snakes.
Once the cable is clean, retract it fully into the drum of the drain snake and store it in a safe place until it’s needed again.
How to Use a Drain Snake on a Tub or Shower Drain
Not only the toilet but your tub or shower can also get clogged. In this case, follow our easy step-by-step instructions to use a drain snake to tackle this problem. Keep reading!
Remove the Drain Cover and Plug

The initial step is to remove the drain cover and plug to access the drain pipe where the clog is located.
Most drain covers can be removed by simply unscrewing them with a screwdriver or prying them off with a flat tool, such as a putty knife. If your drain has a plug, you must also remove it.
Make sure to have a bucket or a towel nearby to catch any excess water that may come out of the drain. Once the drain cover and plug are removed, you’ll be ready to begin snaking the drain.
Inspect the Drain
Inspecting the drain is an optional but recommended next step when using a drain snake on a tub or shower drain. It can help you identify the cause and location of the clog so you can use the drain snake more effectively.
To inspect the drain, shine a flashlight into the drain pipe and look for any visible blockages, such as hair, soap scum, or other debris. If you see a blockage near the surface, you may be able to remove it with a pair of pliers or tweezers.
However, if the blockage is deeper in the pipe, you must use a drain snake to break it up and clear the clog. Inspecting the drain can help you determine the best approach for snaking the drain.
Snake the Drain
Once you have done the elementary steps above, the next step is to do the snaking.
To snake the drain, insert the end of the drain snake into the drain pipe and push it in as far as it will go. Then, slowly twist and turn the snake while pushing it further into the pipe. This will help the coil at the end of the snake grab onto the clog and break it up.
If you encounter resistance or feel like you’ve hit a bend in the pipe, rotate the snake to try to maneuver around the blockage. Keep pushing the snake forward until you feel it pass through the clog and can move it freely. Once you’ve snaked the drain, carefully remove the snake from the pipe, being sure not to pull too quickly or forcefully and causing any damage to the pipe.
Remove the Snake
The next step is to remove the snake from the drain pipe. To do this, carefully pull the snake out of the pipe, making sure not to yank it too quickly or forcefully, which can damage the pipe or cause any remaining debris to get stuck in the pipe.
As you remove the snake, wipe it down with a rag to clean off any debris that may have accumulated on it. Then, rinse the snake thoroughly with water and a cleaning solution (if needed) to ensure it’s clean and ready to use next time.
Test the Drain
Testing the drain is the final step when using a drain snake on a tub or shower drain. This step is important to ensure that the blockage has been completely cleared and that water is flowing freely down the drain again.
To test the drain, turn on the water and let it run for a few minutes. Pay close attention to the flow of water down the drain. If the water is still slow or isn’t draining at all, then the clog may not have been fully cleared, and you may need to repeat the snaking process or try another method to get rid of the blockage.
However, if the water flows freely down the drain, congratulations! You’ve successfully used a drain snake to clear your tub or shower drain.
Frequently Asked Questions
What is a drain snake?
A drain snake is a flexible tool used to clear blockages from pipes. It has a coiled wire with a sharp tip that breaks up and removes obstructions from drains. It is a cost-effective tool for DIY plumbing repairs.
How do drain snakes work?
A drain snake works by being inserted into a drain and turned to break up and remove blockages. The corkscrew-like tip dislodges debris, and the coil catches it for removal.
Which types of clogs require drain snakes?
Drain snakes are used for clearing small blockages caused by hair, soap scum, and debris in sinks, tubs, and showers. Professional plumbing services are needed for larger or more serious clogs.
Conclusion
In conclusion, using a drain snake can be a cost-effective and straightforward solution for keeping your pipes clear of blockages. Following the simple steps above, you can effectively use a drain snake to remove small clogs caused by hair, soap scum, and debris in sinks, tubs, toilets, and showers.
Remember to take safety precautions and avoid utilizing a drain snake for significant or complicated clogs that require professional plumbing services.
With some practice and patience, you can become a DIY plumbing expert and save time and money by tackling minor plumbing issues with a trusty drain snake. So, don’t hesitate to try and see how easy it is to keep your pipes flowing smoothly!